el-John-o
Dabbler
- Joined
- Jan 26, 2013
- Messages
- 15
Most folks on this forum are pretty aware of the need for an off-site backup. An ideal low-cost solution for data redundancy, for example, is for a user to backup all of their machines to one central server (like one running FreeNAS) and then mirror the contents of that server to some sort of off-site backup. Be it another NAS unit with Rsync, or one of many cloud-storage solutions.
FreeNAS supports Rsync, and there are some cloud options that also support it. However, most of these are expensive, aren't TRULY unlimited (have caps over a certain amount of data, or simply only allow a certain amount of data with a pretty intense cost!), and many Rsync compatible firms get very very poor reviews. What is the point of a backup solution where you can't backup everything, or that won't be there when you need it?
CrashPlan is really popular for a lot of reasons. It garners excellent reviews, is very fast, doesn't have speed caps, AND is super affordable. A few bucks a month and you've got all the off-site storage you can eat. You can only backup from one computer per account, but Crashplan supports backing up from external drives AND, Crashplan software natively supports backing up multiple computers to one central computer, and then backing up that one central computer.
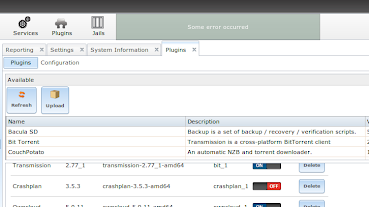
But, FreeNAS and CrashPlan aren't exactly 'compatible'. CrashPlan software doesn't work in FreeNAS, and CrashPlan doesn't support RSync.
So there were a few complicated and convoluted solutions out there, but I'll tell you what I did to get CrashPlan working with FreeNAS.
First, I salvaged an old computer. I had this laptop sitting in my closet forever, it's a 166MHz Pentium II CPU with 192MB of RAM. It has a 6GB hard-drive. And, it works just fine! I'm able to completely saturate my cable internet upload speed (which is only a measly 4mbps). So unless you have a really fast upload speed, an old machine will work just fine for this. It does not need to be a performance demon.
Next, I installed Ubuntu Server 12.04 32-bit. I configured it with OpenSSH, and the necessary tools to mount both NFS and Samba shares. I then configured Ubuntu to mount both my NAS's NFS share, and my Apple Time Capsule's CIFS (Samba) share automatically. I could have just as easily used Samba for both, however. NFS is much faster for me, but, with a 4mbps upload speed just about ANY FreeNAS configuration will be more than fast enough.
Next, I followed these instructions for installing CrashPlan on Ubuntu Linux AND configuring it via another computer. Just in case that link ever goes down, I'll copy the instructions below;
1) Download Crashplan for Linux from the Crashplan website
2) Extract the files and place them in a folder on the Ubuntu Server machine
(In my case, due to the very slow CPU I deemed it better to extract on my mac and copy the files rather than let the server extract the files. I think copied them over to a folder on the root drive called 'crash', and enabled a Samba share for that folder. You need to install Samba to access CIFS shares anyway, so I was already halfway there)
3) Install the CrashPlan engine
4) Make sure the CrashPlan engine is started
Now here's the fun part. There's probably a way to configure crashplan on a non-GUI OS like Ubuntu Server, but why? The crashplan GUI is simply a client. By default, it connects to localhost, but it can be changed!
In Mac OS X (Sorry, haven't tested it on Windows but I'm sure you can adapt the settings. It's very similar for Linux, I know that)
5) Install Crashplan for Mac OS X
6)Edit the config file:
uncomment the line 'serviceport=4243' and change the port to 4200. So it should simply read;
Now, we need to make a simple SSH tunnel to the Ubuntu server. In Mac OS X this is done right from the terminal, otherwise use an SSH client on Windows.
From the OS X Terminal;
Where 'user' is your Ubuntu username and 'host' is the IP or hostname of the server. Enter the password when prompted.
Now, open up the CrashPlan application, and you'll actually be configuring your Ubuntu server! Log in, go to the 'backup' tab and click 'change' under the 'files' section. Select your FreeNAS share. In my case, I mounted FreeNAS at /media/nas and the time capsule at /media/atc, so I was able to select both in the application.
Boom, click 'start backup', and there ya go! Easy as pie!
CrashPlan's application ALSO works to backup to another machine. So, if you had an off-site machine running Windows, Linux or Mac OS X that for some reason you couldn't Rsync to, you could use Crashplan to backup your NAS to that machine.
This same solution would work (with a few less steps) over a Mac OS X server as well. I used an old computer running Ubuntu so that it could be a 'set-and-forget' always on solution that will automatically backup my NAS. After the initial backup (which will take a few days), it will backup the FreeNAS share every day at 3AM, automatically scanning for new or changed files.
It would ALSO work on a Windows powered server, however, Windows won't natively allow you to backup mounted or external drives. If you google around though, there is a workaround. Crashplan says they support it, but there is some sort of an issue with Windows not making it possible with their App.
So anyway, if you're like me and have old hardware laying around, I think this is an excellent way to have a backup of your NAS. It has the advantage of being always on without me having to leave my Windows PC's or Mac's on, it doesn't require complicated configuration on FreeNAS or weird scripts, AND it allows you to aggregate content from your entire network, like multiple NAS units, other network storage solutions, or even the hard drive on your computer (Crashplan automatically 'picks up where it left off' so if you share and mount your computers hard drive, CrashPlan will backup it's files whenever it can, and pick up where it left off each time the computer is turned on or is back on the network). You can also configure this server as a backup source for other computers running CrashPlan, maybe a computer at work or something. They don't need an account to backup to another CrashPlan machine (you only need an account to backup to the cloud). You could then configure CrashPlan to store backups in your NAS, making CrashPlan a super nice and easy way to backup any computer to your NAS. (However, if your hardware is as cruddy as mine it'll be slow!)
Hope this helps, maybe there's nobody else out there with the same unique circumstances as me (Wants to use Crashplan and has some extra hardware lying around, or a 24/7 server running Linux, OSX or Windows!). I think this is a LOT easier than the 'I'm not sure if this will work' solutions I've found. And it works great.
-John
FreeNAS supports Rsync, and there are some cloud options that also support it. However, most of these are expensive, aren't TRULY unlimited (have caps over a certain amount of data, or simply only allow a certain amount of data with a pretty intense cost!), and many Rsync compatible firms get very very poor reviews. What is the point of a backup solution where you can't backup everything, or that won't be there when you need it?
CrashPlan is really popular for a lot of reasons. It garners excellent reviews, is very fast, doesn't have speed caps, AND is super affordable. A few bucks a month and you've got all the off-site storage you can eat. You can only backup from one computer per account, but Crashplan supports backing up from external drives AND, Crashplan software natively supports backing up multiple computers to one central computer, and then backing up that one central computer.
But, FreeNAS and CrashPlan aren't exactly 'compatible'. CrashPlan software doesn't work in FreeNAS, and CrashPlan doesn't support RSync.
So there were a few complicated and convoluted solutions out there, but I'll tell you what I did to get CrashPlan working with FreeNAS.
First, I salvaged an old computer. I had this laptop sitting in my closet forever, it's a 166MHz Pentium II CPU with 192MB of RAM. It has a 6GB hard-drive. And, it works just fine! I'm able to completely saturate my cable internet upload speed (which is only a measly 4mbps). So unless you have a really fast upload speed, an old machine will work just fine for this. It does not need to be a performance demon.
Next, I installed Ubuntu Server 12.04 32-bit. I configured it with OpenSSH, and the necessary tools to mount both NFS and Samba shares. I then configured Ubuntu to mount both my NAS's NFS share, and my Apple Time Capsule's CIFS (Samba) share automatically. I could have just as easily used Samba for both, however. NFS is much faster for me, but, with a 4mbps upload speed just about ANY FreeNAS configuration will be more than fast enough.
Next, I followed these instructions for installing CrashPlan on Ubuntu Linux AND configuring it via another computer. Just in case that link ever goes down, I'll copy the instructions below;
1) Download Crashplan for Linux from the Crashplan website
2) Extract the files and place them in a folder on the Ubuntu Server machine
(In my case, due to the very slow CPU I deemed it better to extract on my mac and copy the files rather than let the server extract the files. I think copied them over to a folder on the root drive called 'crash', and enabled a Samba share for that folder. You need to install Samba to access CIFS shares anyway, so I was already halfway there)
3) Install the CrashPlan engine
Code:
bash install.sh
4) Make sure the CrashPlan engine is started
Code:
/etc/init.d/crashplan start
Now here's the fun part. There's probably a way to configure crashplan on a non-GUI OS like Ubuntu Server, but why? The crashplan GUI is simply a client. By default, it connects to localhost, but it can be changed!
In Mac OS X (Sorry, haven't tested it on Windows but I'm sure you can adapt the settings. It's very similar for Linux, I know that)
5) Install Crashplan for Mac OS X
6)Edit the config file:
Code:
/Applications/CrashPlan.app/Contents/Resources/Java/conf/ui.properties
uncomment the line 'serviceport=4243' and change the port to 4200. So it should simply read;
Code:
serviceport=4200
Now, we need to make a simple SSH tunnel to the Ubuntu server. In Mac OS X this is done right from the terminal, otherwise use an SSH client on Windows.
From the OS X Terminal;
Code:
ssh -L 4200:localhost:4243 user@host
Where 'user' is your Ubuntu username and 'host' is the IP or hostname of the server. Enter the password when prompted.
Now, open up the CrashPlan application, and you'll actually be configuring your Ubuntu server! Log in, go to the 'backup' tab and click 'change' under the 'files' section. Select your FreeNAS share. In my case, I mounted FreeNAS at /media/nas and the time capsule at /media/atc, so I was able to select both in the application.
Boom, click 'start backup', and there ya go! Easy as pie!
CrashPlan's application ALSO works to backup to another machine. So, if you had an off-site machine running Windows, Linux or Mac OS X that for some reason you couldn't Rsync to, you could use Crashplan to backup your NAS to that machine.
This same solution would work (with a few less steps) over a Mac OS X server as well. I used an old computer running Ubuntu so that it could be a 'set-and-forget' always on solution that will automatically backup my NAS. After the initial backup (which will take a few days), it will backup the FreeNAS share every day at 3AM, automatically scanning for new or changed files.
It would ALSO work on a Windows powered server, however, Windows won't natively allow you to backup mounted or external drives. If you google around though, there is a workaround. Crashplan says they support it, but there is some sort of an issue with Windows not making it possible with their App.
So anyway, if you're like me and have old hardware laying around, I think this is an excellent way to have a backup of your NAS. It has the advantage of being always on without me having to leave my Windows PC's or Mac's on, it doesn't require complicated configuration on FreeNAS or weird scripts, AND it allows you to aggregate content from your entire network, like multiple NAS units, other network storage solutions, or even the hard drive on your computer (Crashplan automatically 'picks up where it left off' so if you share and mount your computers hard drive, CrashPlan will backup it's files whenever it can, and pick up where it left off each time the computer is turned on or is back on the network). You can also configure this server as a backup source for other computers running CrashPlan, maybe a computer at work or something. They don't need an account to backup to another CrashPlan machine (you only need an account to backup to the cloud). You could then configure CrashPlan to store backups in your NAS, making CrashPlan a super nice and easy way to backup any computer to your NAS. (However, if your hardware is as cruddy as mine it'll be slow!)
Hope this helps, maybe there's nobody else out there with the same unique circumstances as me (Wants to use Crashplan and has some extra hardware lying around, or a 24/7 server running Linux, OSX or Windows!). I think this is a LOT easier than the 'I'm not sure if this will work' solutions I've found. And it works great.
-John